¶ Getting started with StatTech. Registration, authorization, slot purchase, database download
¶ Registration and authorization
If the user is not registered in the program, they must click the corresponding button and complete the registration process (Fig. 1).

Figure 1 - “Register” button on the landing page (web page) of the site
A form will open where you need to fill in your email, username, create a password, and re-enter it (Fig. 2). Then click on the “Register” button. Next, an email will be sent to the address you entered, and you will need to click on the link in the email to complete the registration.
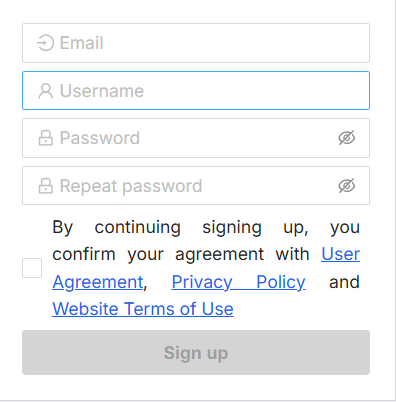
Figure 2 - New user registration form
For subsequent logins, you will only need to go through authorization. In this form, enter your email and password, or you can authorize through your Google account (Fig. 3).
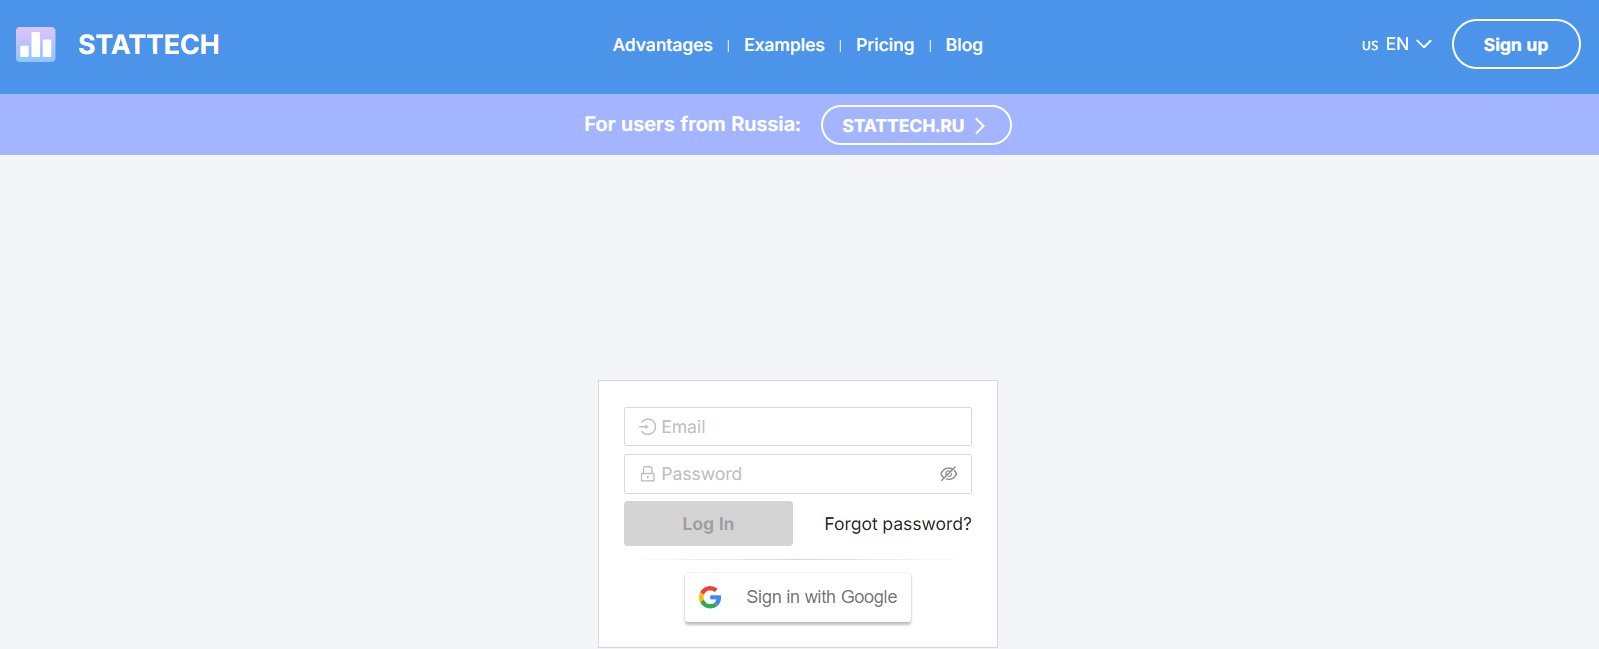
Figure 3 - Authorization form for logging into your personal account
¶ Personal Account
After registering and logging in to the website, go to “Personal Account” (Fig. 4).
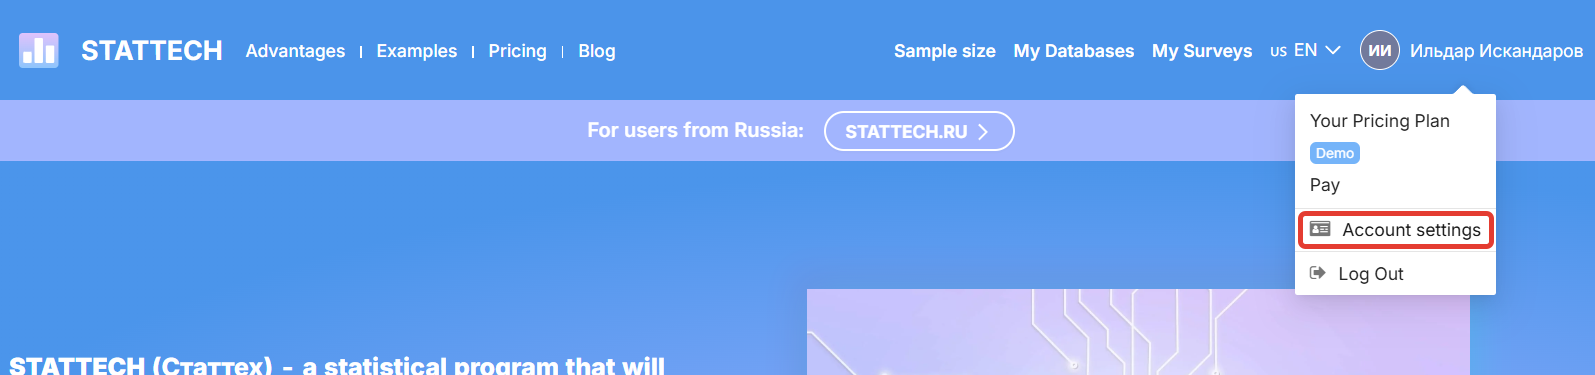
Figure 4 - “Personal Account” button on the landing page (web page) of the website
Your personal account consists of the following sections (Fig. 5):
-
“Personal Information” - this section stores your personal information
-
“Referral Program” - terms and conditions and links for the affiliate program
-
“Database Management” - displays all uploaded databases and the “Add Slot” function
-
“Account Settings” - contains the functionality for changing the account password
-
“Suggest an Idea” - the ability to write your idea for improving and modernizing the site
-
“Leave Feedback” - the ability to write your feedback about the site
-
The ability to “Log Out of Account”

Figure 5 - Sections of the personal account
¶ Personal information
This section of the personal account stores personal account information (Fig. 6).
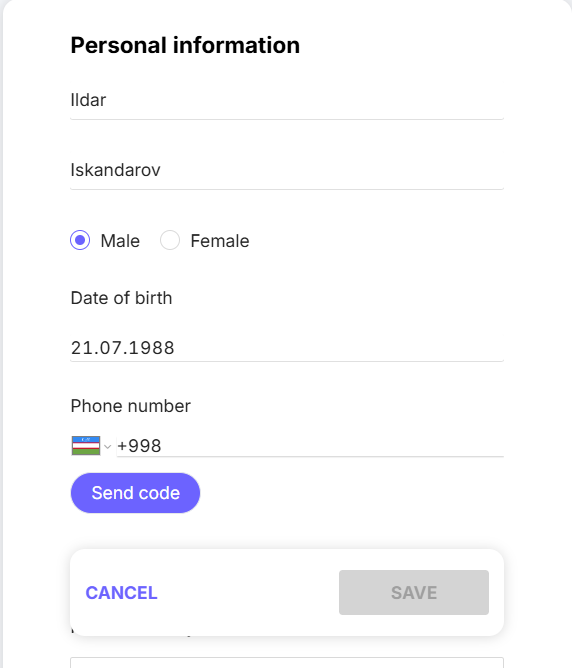
Figure 6 - Form for entering personal data in your personal account
Filling out this form involves filling in fields such as “First name,” “Last name,” gender, “Date of birth,” “Phone number,” and “City.”
This section also allows you to fill in information about your professional and scientific activities (Fig. 7).
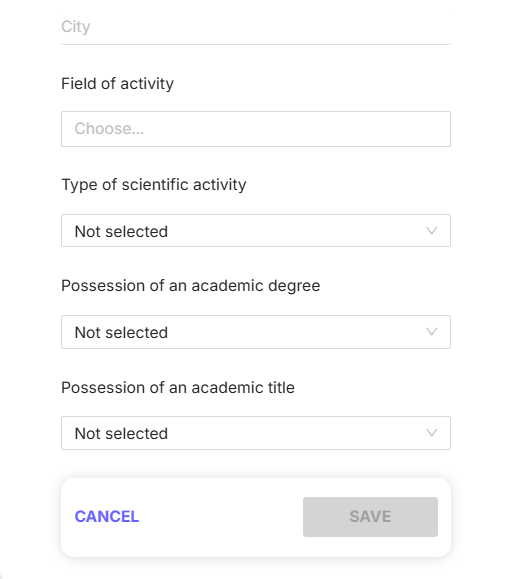
Figure 7 - Form for entering data about professional and scientific activities in your personal account
- “Field of activity” - here you select your field of work, for example, if you work as a physician-therapist, select “Medicine, veterinary medicine” (Fig. 8). Clicking on the “Field of activity” field will open a drop-down list with options for filling in this line.
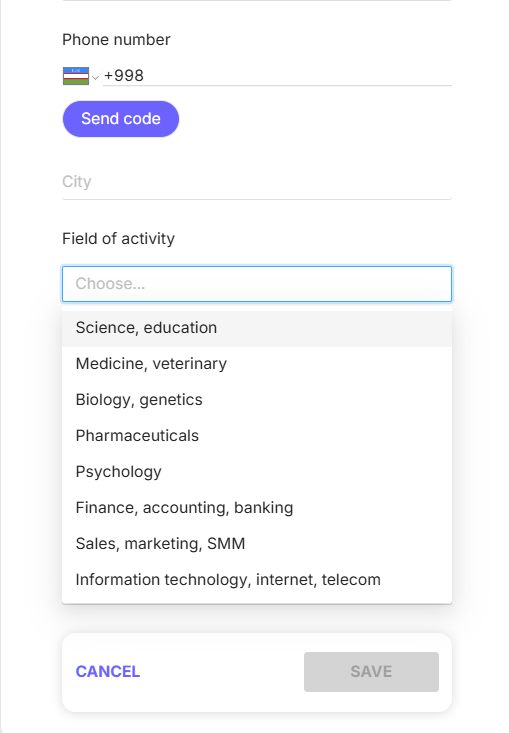
Figure 8 - Drop-down list of options for filling in the “Field of activity” line
- “Type of scientific activity” refers to the level of scientific activity. This field also has options in the form of a drop-down list, which can be accessed by clicking on the icon

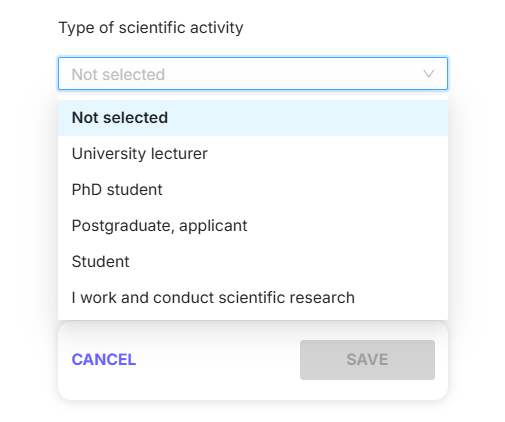
Figure 9 - Drop-down list of options for filling in the “Type of scientific activity” field
- “Academic degree” implies options for filling in this line with information about the presence or absence of an academic degree. Click on the icon to select an answer (Fig. 10).
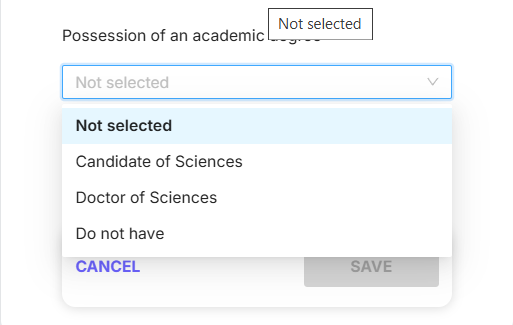
Figure 10 - Drop-down list of options for filling in the “Academic degree” field
- “Academic title” requires filling in this line with either “I do not have” or selecting an academic title. As in the previous lines, the filling functionality remains the same: the
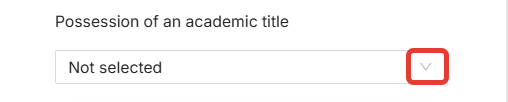
Figure 11 - Drop-down list button in the “Academic title” field
After filling in the fields with personal data and the fields about professional and scientific activities, you must click on the “Save” button (Fig. 12).
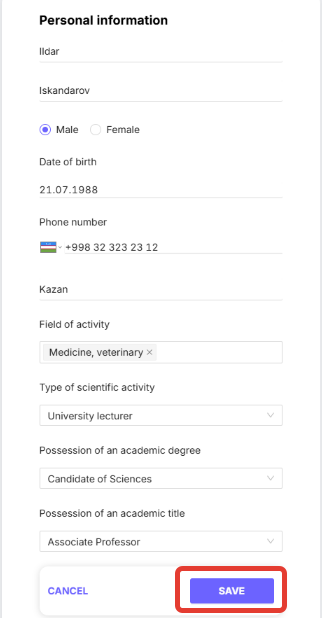
Figure 10 - “Save” button in the “Personal Information” section and an example of filling out the form
¶ Referral Program
This section of your personal account shows what a referral program is (Fig. 11), how you can use it, and how many bonuses you will receive for doing so.
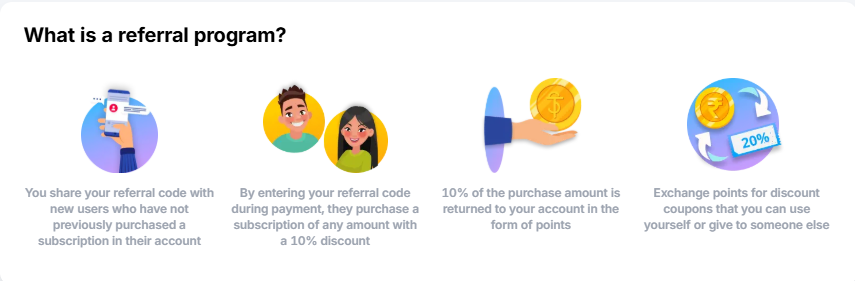
Figure 11 - What is a referral program
A referral program is a bonus program. You share your personal referral link, and your friends subscribe to our website by clicking on it. You receive bonuses in the form of 10% to your account, or 5% each with the person (Fig. 13) who subscribes using your link (Fig. 12).
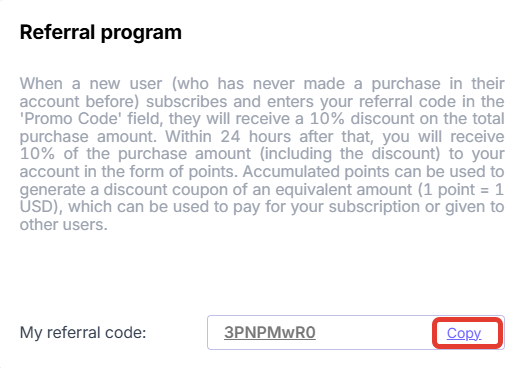
Figure 12 - Personal referral link

Figure 13 - Selecting a bonus accrual option
In this section of your personal account, you can also view the number of points you have accumulated and generate a discount coupon (Fig. 14). You can use the discount coupon when purchasing or renewing a tariff package.
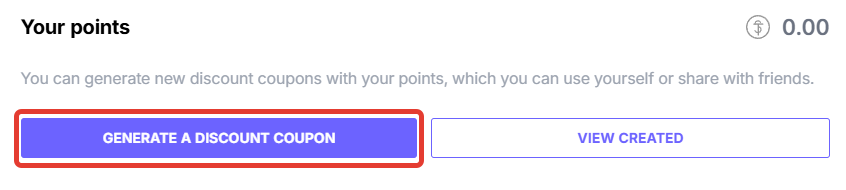
Figure 14 - “Generate discount coupon” button in the “Referral program” section of your personal account
Another feature in this section is the ability to view how many people have used your referral link and how many of them have subscribed (Fig. 15).
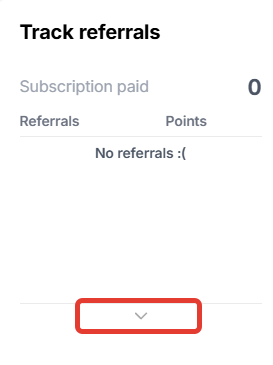 Figure 15 - “View” button for tracking referrals
¶ Database Management
The “Database Management” section displays the number of slots purchased and the number of databases downloaded. This section also has an “Add Slot” option (Fig. 16).
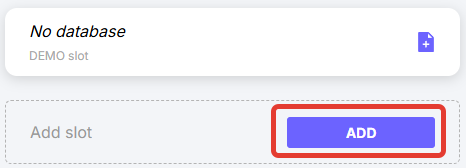
Figure 16 - “Add slot” button in the “Database management” section of your personal account
After clicking on the “Add” button, the site will redirect you to select a tariff package and pay for it (Fig. 17).
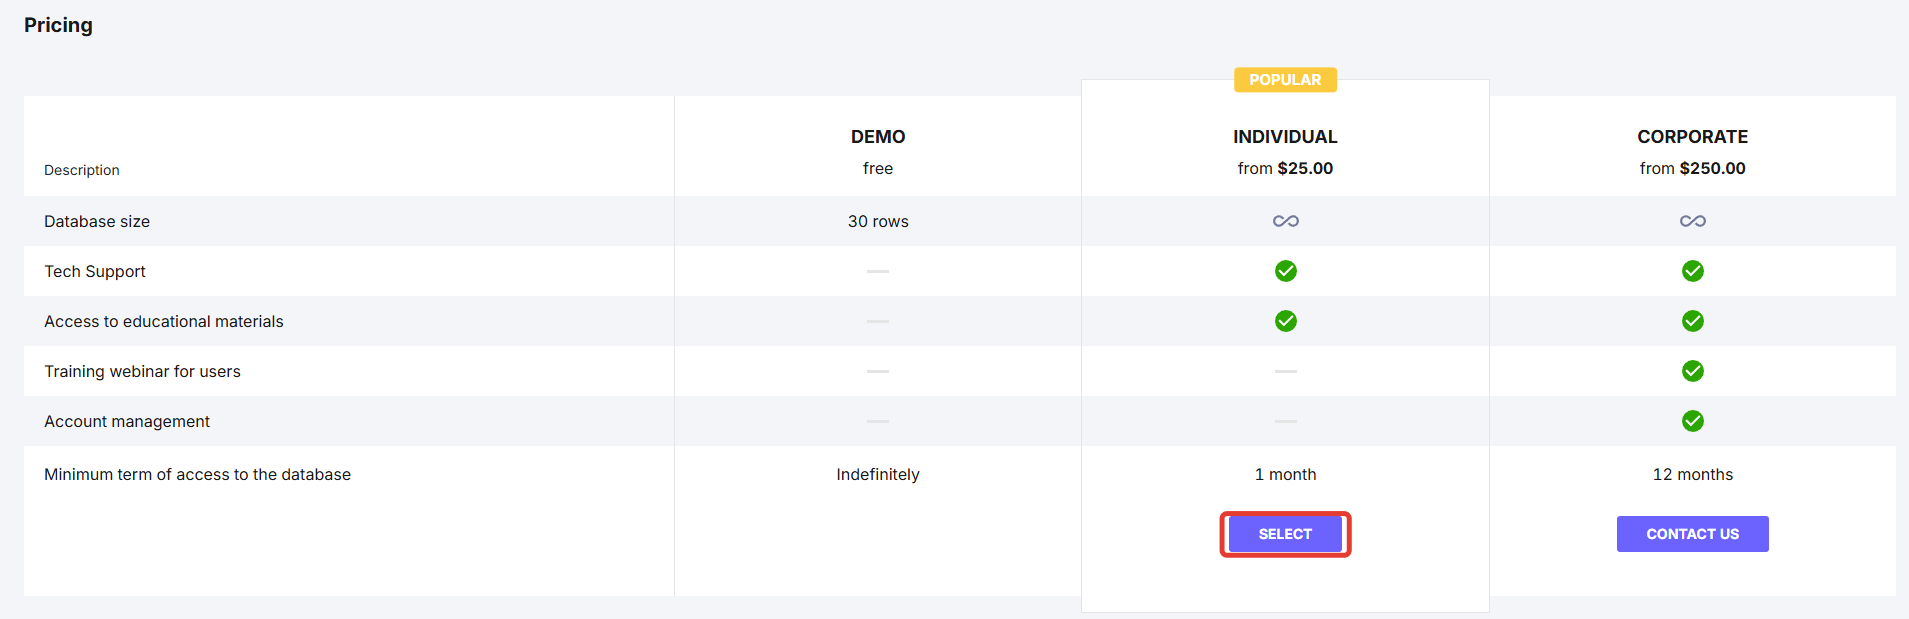
Figure 17 - Selecting a suitable tariff
After clicking the “Select” button, a data entry form will open, which allows you to select the number of databases and the number of months of use (Fig. 18). After filling in this information, click the “Pay” button and the website will redirect you to the payment page.
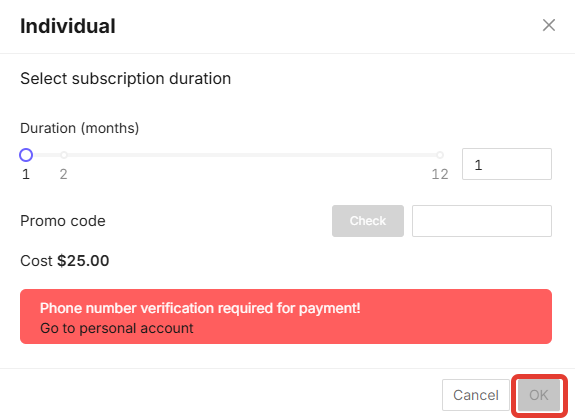
Figure 18 - Tariff package settings interface
¶ Account settings
The “Account settings” section contains a function for changing your personal account password.
To change your password, you must first enter your current personal account password in the “Current password” field. In the “New password” field, enter the password you have created, and in the “Repeat new password” field, duplicate what you entered in the “New password” field. Then click the “Save” button to save the changes (Fig. 19).

¶ Suggest an idea and leave feedback
The “Suggest an idea” and “Leave feedback” sections in your personal account allow you to switch to your email to leave feedback, an idea, or a request in the StatTech website technical support chat.
On Windows, you will be redirected to Microsoft Outlook, where you can add your email address if it has not already been added and write to us (Fig. 20).
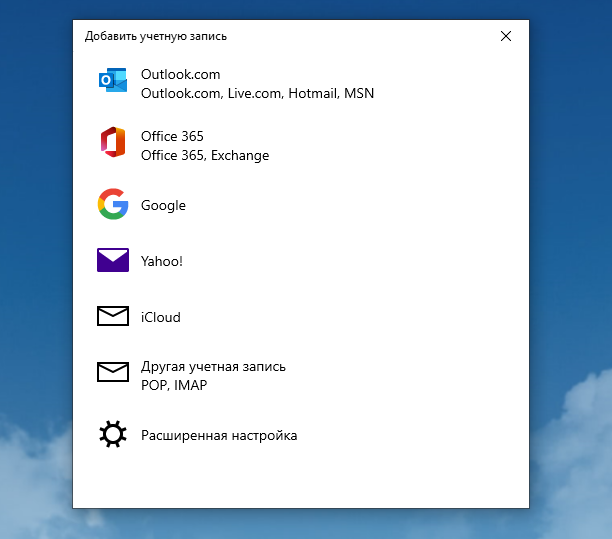
Figure 20 - Window for redirecting to email via the Microsoft Outlook application
¶ Log out of your account
Your personal account also has a “Log out of your account” function (Fig. 21).
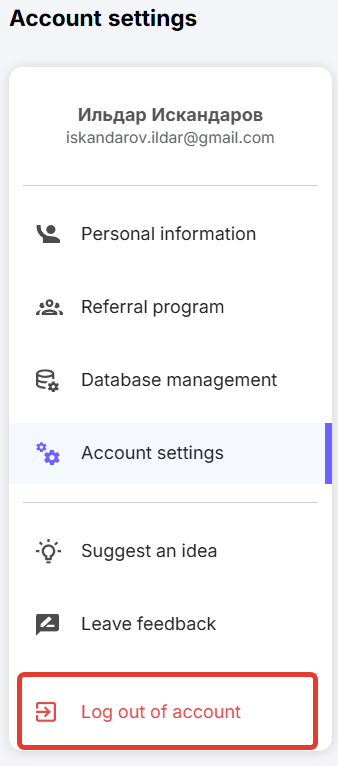
Figure 21 - “Log out of account” button in your personal account
You can also log out of your account on the website's home page (Fig. 22). You need to click on the  sign on the site's home page.
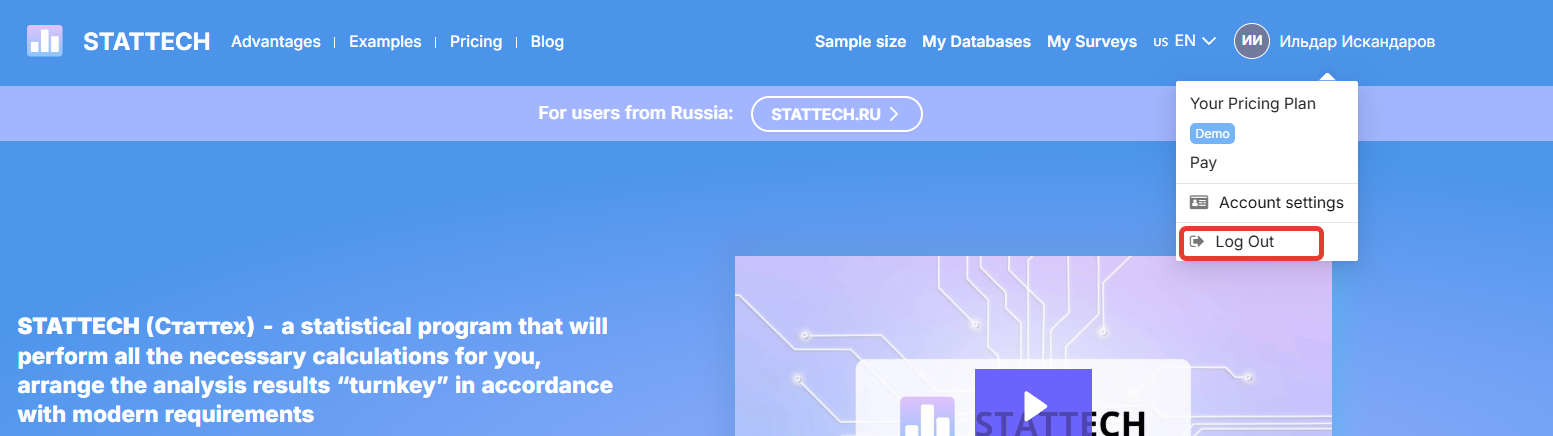
Figure 22 - “Log out” button on the landing page (web page) of the site
¶ Purchasing a slot
After logging in, select the operating mode: “Demo” or “Individual” (“Corporate” mode is only activated for organizations).
When selecting the free “Demo” mode, you can download a database with no more than 30 rows. Access to this mode is unlimited. The database from the “Demo” mode slot can be deleted and replaced with a new one an unlimited number of times.
The paid “Individual” mode differs from the “Demo” mode in that it allows you to upload a database of any size and purchase additional slots for simultaneous uploading of several databases. The validity period of this tariff is determined by the user, with a minimum period of 12 months. After the expiration of the tariff, the user can renew it.
To purchase a slot, click the “Top up” button in your personal account (Fig. 23) and select the appropriate tariff (Fig. 24).
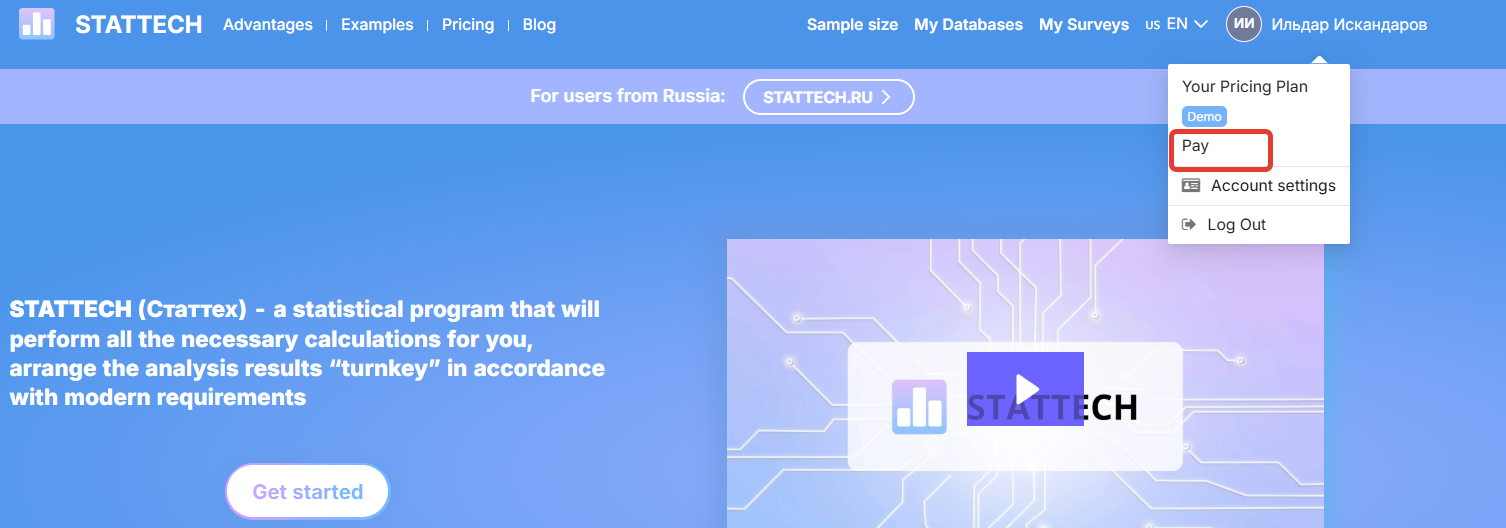
Figure 23 - “Top up” button to go to the form for purchasing/renewing access to the program
Figure 24 - Page for selecting a suitable tariff
After clicking the “Select” button, a data entry form will open, which allows you to select the number of databases and the number of months of use (Fig. 25). After filling in this information, click the “Pay” button and the site will redirect you to the payment page.
Figure 25 - Tariff package settings interface
¶ Loading the database
After purchasing a slot, click the “My Databases” button to load the data (Fig. 26).
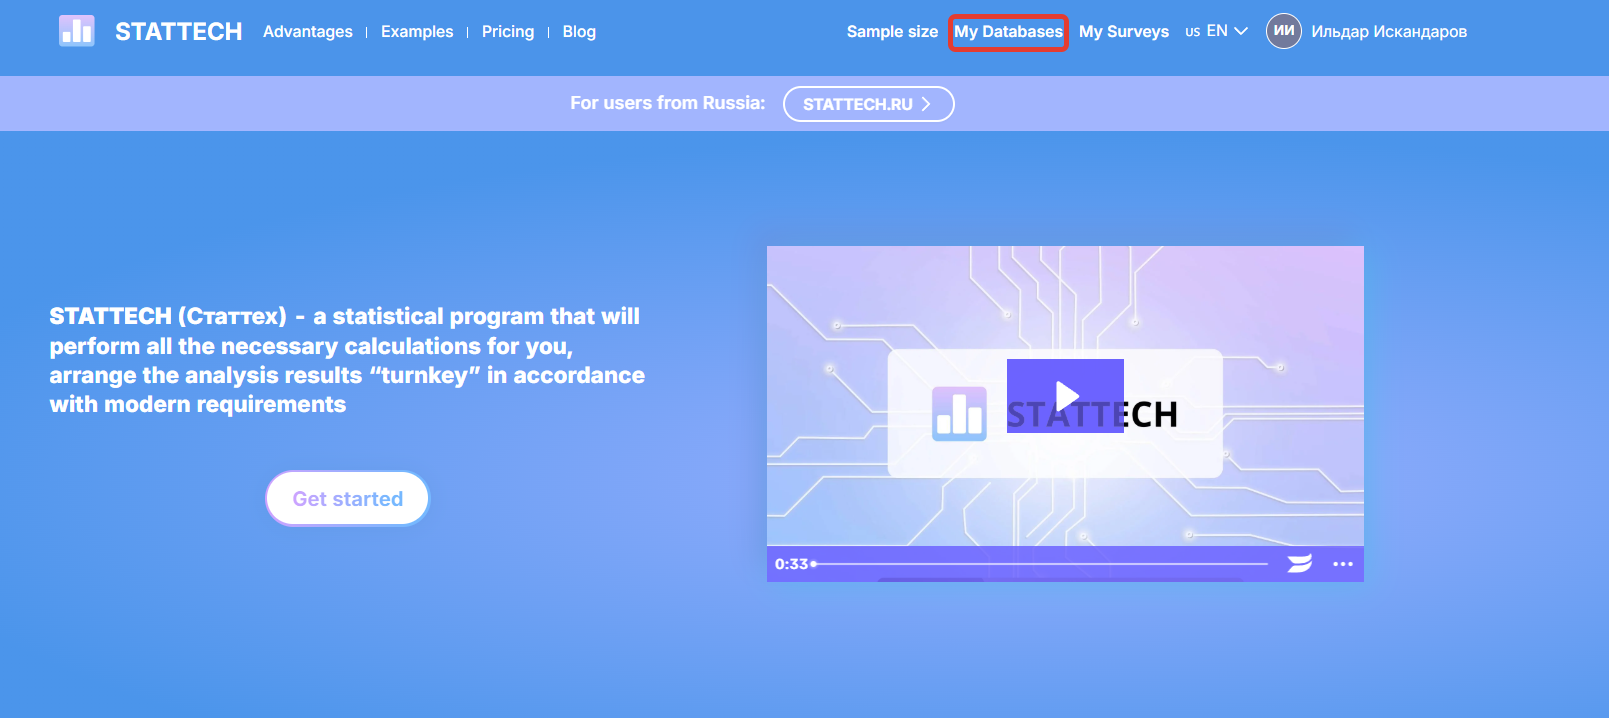
Figure 26 - “My databases” button on the website's home page (landing page)
If necessary, you can delete the database to free up space for downloading another database.
Select “Download database” (Fig. 27), then select a database in .XLSX (MS Excel) or .STDB format from your computer files and confirm the download (Fig. 28 and Fig. 29). A message will appear on the screen indicating that the database has been successfully downloaded.
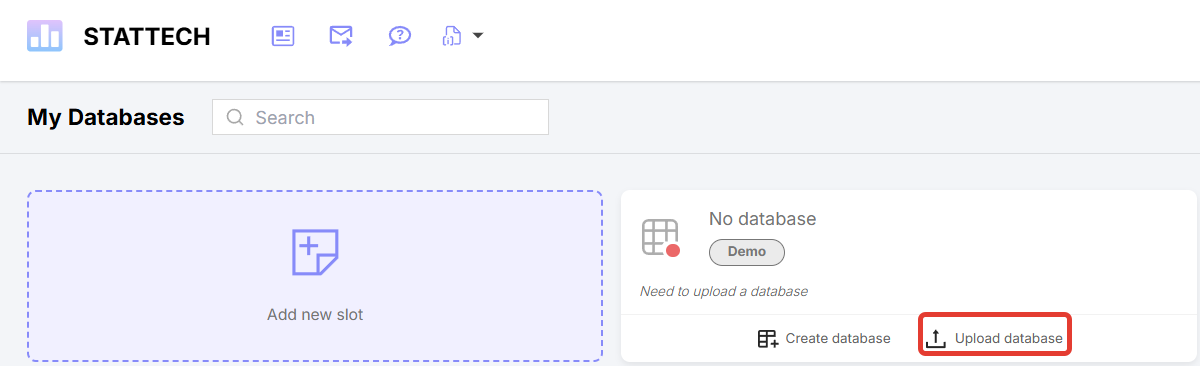
Figure 27 - “Load database” button
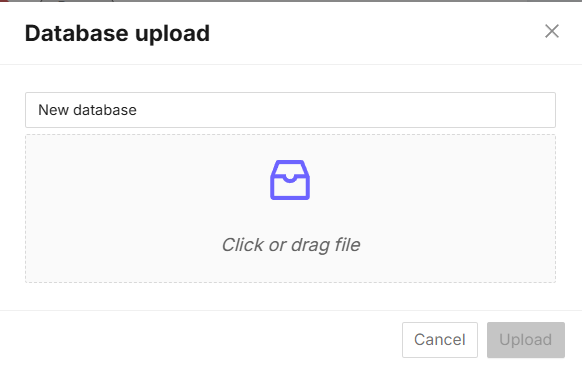
Figure 28 - Database loading interface
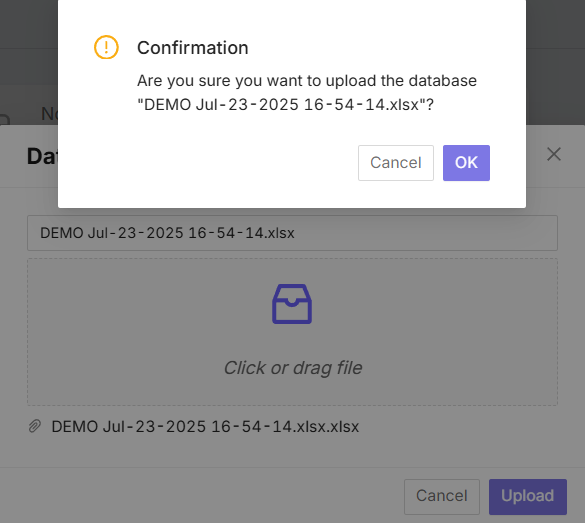
Figure 29 - Database download confirmation window
¶ Creating an empty database
If you do not have a ready-made database, you can create an empty database by clicking the “Create database” button on a free slot (Fig. 30).
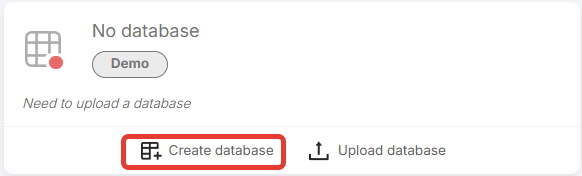
Figure 30 - “Create database” button
After clicking on the button, a form will open where you need to specify the “Database name,” “Number of rows,” and “Number of columns.” After filling in the fields, click on the “Create database” button (Fig. 31).

Figure 31 - Form for creating an empty database
You can create an empty database on the DEMO slot with NO MORE than 30 rows.
¶ Deleting and restoring a database
To delete a database, click the “Delete database” button on the slot in the “My databases” section (Fig. 32).
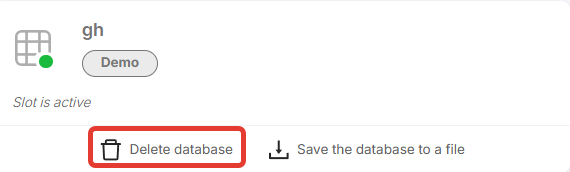
Figure 32 - “Delete database” button on the slot
After deleting the database, it is moved to the trash, where it is stored for 30 days. The “Trash” is located in the upper right corner in the “My Databases” section (Fig. 33).
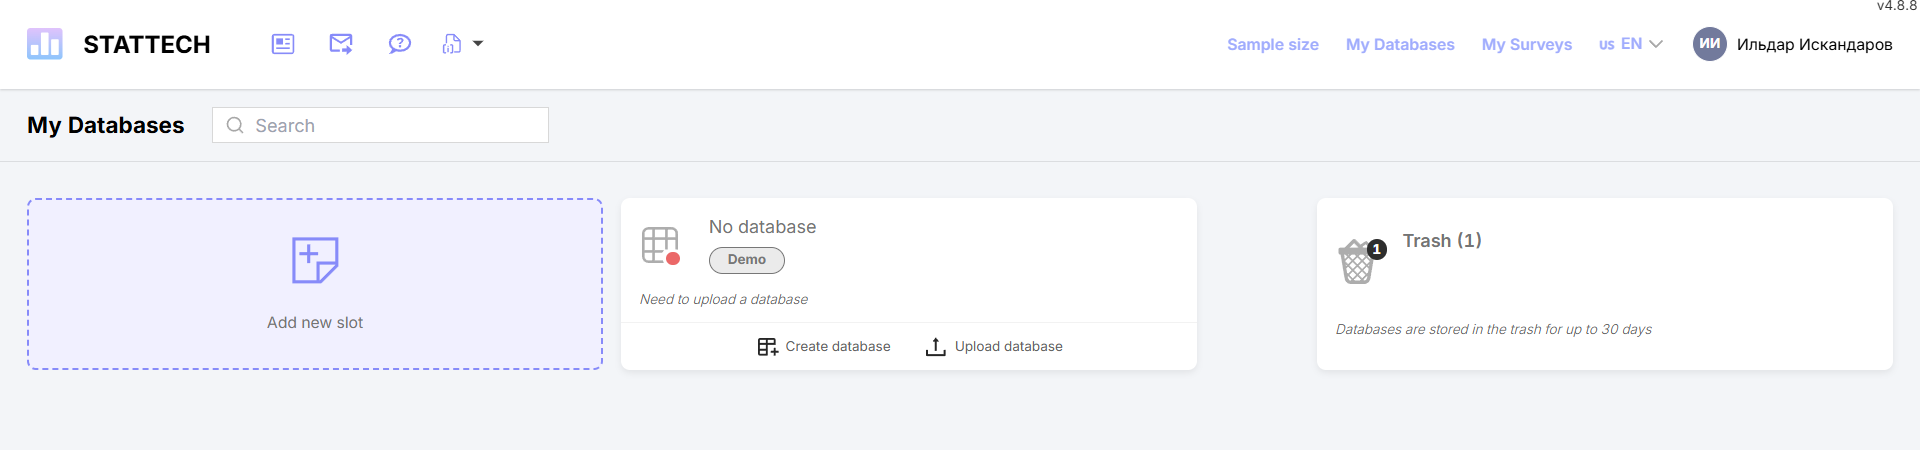
Figure 33 - “Trash” in the “My Databases” section
Clicking on “Trash” opens a form where you can see the deleted databases. On this form, you can “Restore Database” and “Empty Trash” (Fig. 34).
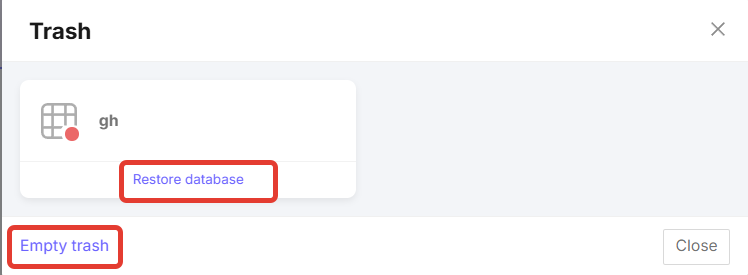
Figure 34 - “Restore database” and “Clear trash” buttons